Click on the pen icon in your tools menu
Ensure that the “paths” icon in the options bar is highlighted.
![]()
Do not select the shape layers tool to its left. You don’t want this one!
With the pen tool selected and the paths icon selected in the options bar, click alongside part of the graphic that you wish to create a path around (good starting points include square points of an image and natural corners – if possible! It’s much easier if you don’t start at the beginning or middle of a curve on the graphic you wish to create a path around) clicking on the image will add a small square start-off point.
Add a second anchor point, and create a straight line joining the two points together!
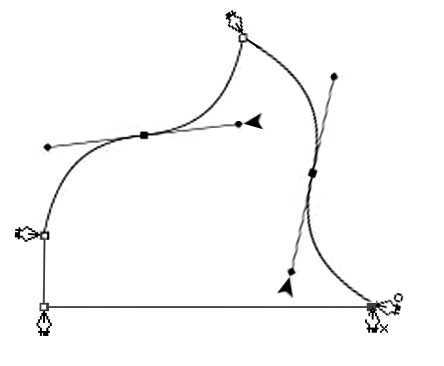
To create a curve you have to make a valued judgment on where the curve needs to bend. Plot your point “over the bridge” of the curve of your image. Once you’ve plotted your end point, you are able to drag your curve by holding left click down and dragging the point to where you want the path to bend. The pen cursor transforms into an arrow cursor when clicking and dragging… This takes practice!
You are also able to correct points using your “convert point tool” in your pen tool drop-down menu (left click and hold to activate your drop down menu options in the pen tool icon.)
To move a point you can hold down the CTRL button on the point you wish to move and move it to the necessary place
To close a path, press the shift key prior to meeting up with your initial path point – left click and shift closes the path off.
(This quick guide to creating a path is by no means a definitive guide! But it may help you to get your path started in the right direction!)

illustration of a simple path route


3 Comments
[…] « Path Basics […]
I’m kinda new to photoshop and this helped a bit. I’m still confused as to how to use the path tool but at least this mini-guide was in plain English! I can’t follow the book instructions without pulling out my hair!
Love your blog Keep em coming you’ve got a fan:)