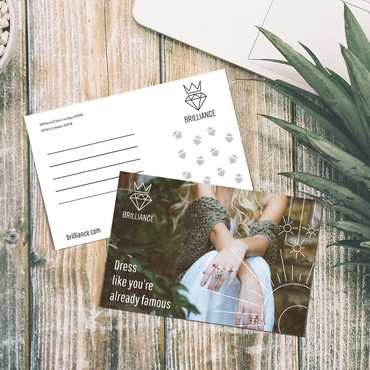
Creating a printed booklet is a great way to organize information that needs more space than a flyer or brochure. Whether you’re designing a product catalog, training manual, event program, or company presentation, a booklet gives readers a clear way to move through your content.
But making a booklet involves more than arranging text and images on a few pages.
You also need to consider booklet page order, page count, binding, bleed, margins, and file setup. A design that looks correct on your computer can turn into a confusing printed piece if the pages aren’t prepared properly.
In this guide, you’ll learn how to make a printed booklet step by step, understand how booklet pages are arranged, and prepare your artwork for professional printing.
How to Make a Printed Booklet in 7 Steps
If you’re creating a booklet for the first time, follow these seven steps:
- Choose your booklet size and binding.
- Determine the total number of pages.
- Organize your content in reading order.
- Set up your document with the correct dimensions.
- Add bleed, margins, and safe zones.
- Export your artwork using the correct file settings.
- Review every page before submitting your booklet for printing.
The most important rule is to design your booklet in normal reading order unless your printing provider specifically requests printer spreads.
Let’s go through each step.
Step 1: Choose Your Booklet Size and Binding
Before designing, decide how large your finished booklet should be.
The size affects how much text, photography, and other information you can comfortably fit on each page.
Two common booklet sizes are:
| Booklet Size | Best For |
| 5.5″ × 8.5″ | Event programs, small catalogs, product guides, and compact promotional booklets |
| 8.5″ × 11″ | Training materials, company presentations, detailed catalogs, and image-heavy layouts |
Both sizes are available through Overnight Prints booklet printing.
A smaller booklet can be convenient for readers to carry, while a larger format gives you more room for detailed content.
What Is Saddle-Stitch Binding?
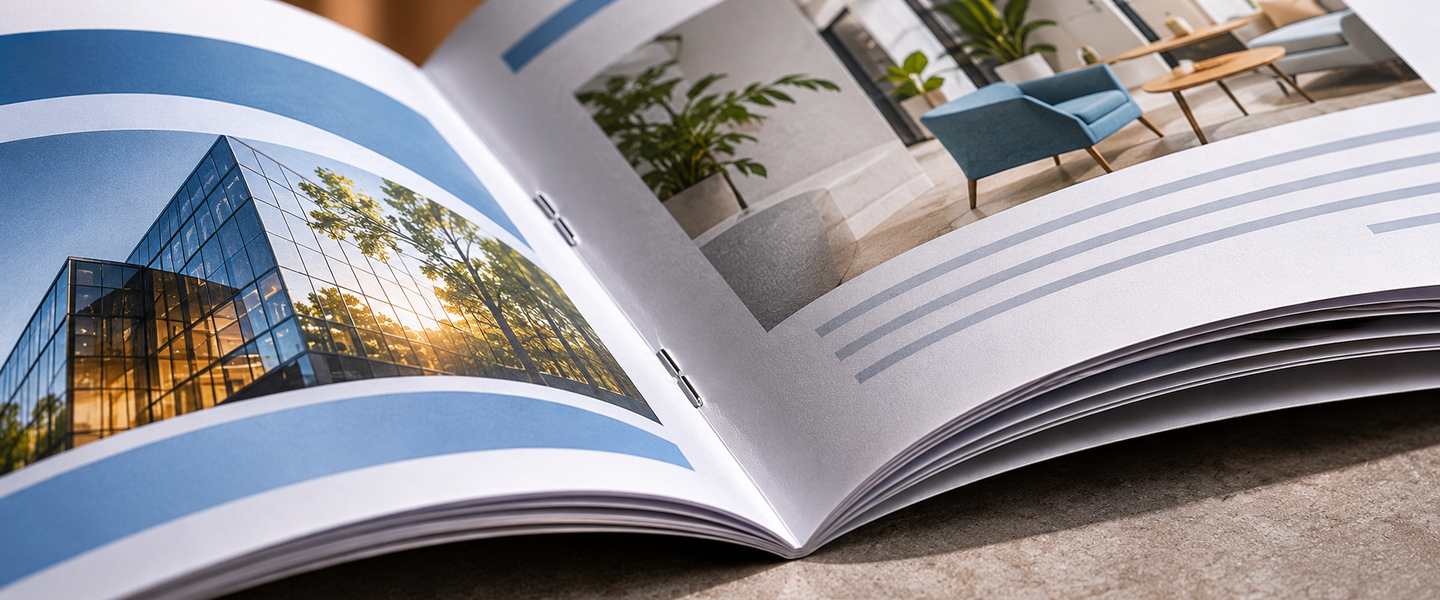
Saddle stitching is a common booklet binding method.
Printed sheets are folded in half, placed together, and secured with staples along the center fold.
This creates a booklet that opens like a magazine.
Saddle-stitched booklets are suitable for materials such as:
- Product catalogs
- Event programs
- Training guides
- Marketing presentations
- Company profiles
- Informational handbooks
Overnight Prints offers saddle-stitched booklets with self-cover and card-cover options.
A self-cover booklet uses the same paper stock for its cover and interior pages. A card cover provides a separate cover option.
Step 2: Understand Booklet Page Counts
One of the most important things to know about booklet printing is that saddle-stitched booklet page counts must be multiples of four.
That’s because each folded sheet creates four pages: two on the front and two on the back.
For example:
| Total Booklet Pages | Cover Pages | Interior Pages |
| 8 | 4 | 4 |
| 12 | 4 | 8 |
| 16 | 4 | 12 |
| 20 | 4 | 16 |
| 24 | 4 | 20 |
| 32 | 4 | 28 |
The total page count includes the front cover, inside front cover, inside back cover, and back cover.
For example, if you order a 16-page booklet, you have 16 pages in total, not 16 interior pages plus a separate four-page cover.
Overnight Prints offers booklet page counts from 8 to 64 pages in increments of four.
What If Your Booklet Has an Odd Number of Pages?
Suppose you’ve finished designing a booklet and end up with 15 pages.
For saddle-stitch printing, you’ll generally need to increase the document to 16 pages.
You could use the additional page for:
- Contact information
- A short company introduction
- A QR code
- A notes section
- A simple branded closing page
You can also leave a page intentionally blank if it makes sense for the layout.
The important thing is to plan the total page count before finalizing your design.
Step 3: Arrange Your Booklet Pages in the Correct Order
Booklet page order can be confusing because printed sheets are folded together.
When a booklet is manufactured, the pages are arranged on printing sheets in a special sequence called imposition.
However, that doesn’t mean you should manually rearrange your artwork.
For professional printing with Overnight Prints, prepare and upload each page individually in normal reading order.
What Is Booklet Page Order?
Reading order is the sequence readers follow when opening your booklet.
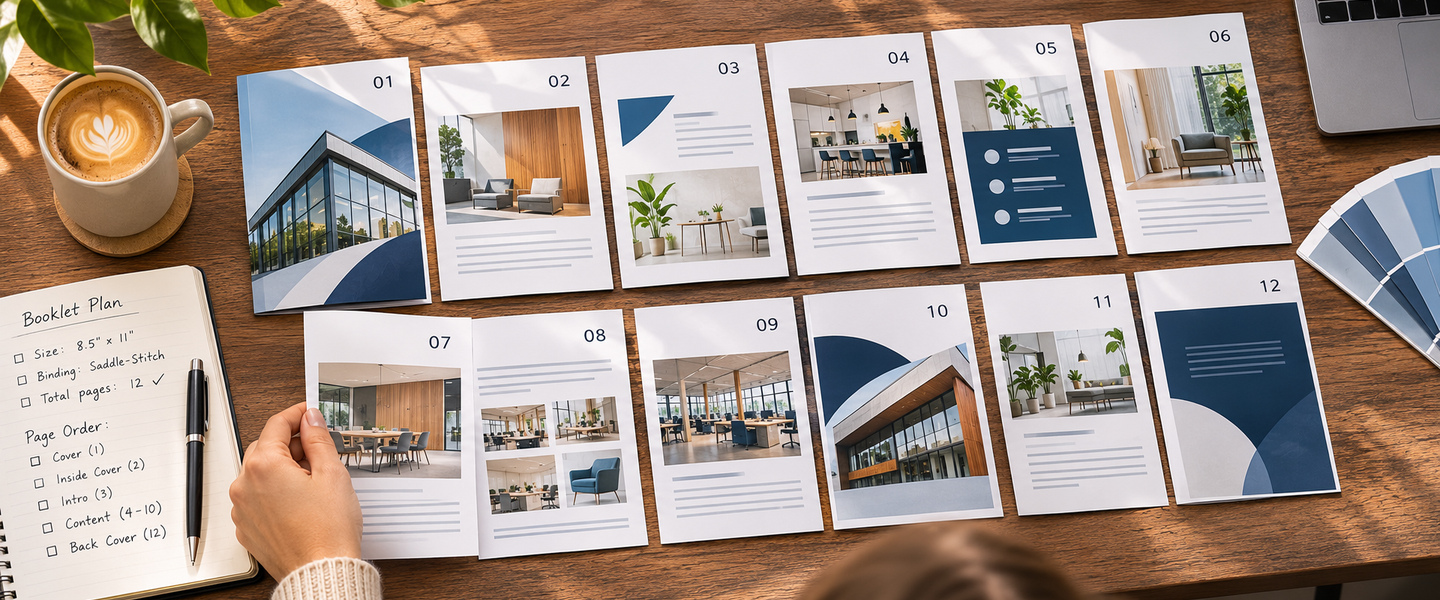
For example, a 12-page booklet would have:
| Page | Suggested Content |
| 1 | Front cover |
| 2 | Inside front cover |
| 3 | Introduction |
| 4–5 | First main section |
| 6–7 | Second main section |
| 8–9 | Third main section |
| 10 | Summary or next steps |
| 11 | Inside back cover |
| 12 | Back cover |
The exact content is up to you, but the page sequence should be logical.
A reader should be able to move from the cover to the introduction, main content, and final page without confusion.
How Are Booklet Pages Arranged for Printing?
During saddle-stitch production, pages are positioned so they appear in the correct order after folding.
For example, on the outer sheet of an eight-page booklet, page 8 is positioned beside page 1 on one side, while pages 2 and 7 appear on the reverse side.
This arrangement is called printer imposition.
It is different from the normal reading order used to create your design.
Important: Overnight Prints recommends uploading individual pages rather than two-page spreads. You don’t need to manually impose the booklet pages yourself.
Single Pages vs. Facing Pages
When designing a booklet, you may use facing-page views in your design software to see how two pages will look together.
This can be helpful when planning:
- Images that continue across two pages
- Section openings
- Page numbers
- Consistent margins
- Visual transitions
However, when preparing your final files, follow the printer’s requirements for individual pages.
For Overnight Prints, individual page uploads are recommended.
Step 4: Set Up Your Booklet Document
Once you’ve chosen the size and page count, you can create your document in a design program.
Adobe InDesign, Illustrator, Canva, and other layout tools can be used to prepare booklet artwork, depending on the complexity of your project.
Start With the Finished Page Size
Set the document dimensions to match the finished booklet.
For example, if you’re creating an 8.5″ × 11″ booklet, the finished pages should be 8.5 inches wide and 11 inches tall.
Then apply the required bleed and safe-zone settings from your printing provider.
Don’t assume that every printing company uses the same bleed measurements.
You can find Overnight Prints’ product-specific templates in its Start Files and Printing Specifications.
Create Consistent Margins
Margins help keep text and images comfortably away from the edges of the page.
For booklets, pay particular attention to the inner margin near the binding.
If text is placed too close to the fold, it may be difficult to read when the booklet is opened.
Consider using slightly more space near the center fold for important content.
Use Page Numbers
Page numbers make longer booklets easier to navigate.
They are particularly useful for:
- Training manuals
- Product catalogs
- Instruction guides
- Event programs
- Educational materials
Place page numbers consistently, usually near the bottom of each page.
You don’t necessarily need to display a number on the front cover, but it still counts toward the total booklet page count.
Step 5: Add Bleed, Trim, and Safe Zones
A print-ready booklet needs to account for what happens during trimming and binding.
Three important concepts are bleed, trim, and safe zone.
| Term | Meaning | What to Do |
| Bleed | Artwork extending beyond the finished page edge | Extend backgrounds and edge-to-edge images |
| Trim | The intended finished edge of the page | Set the document to the correct dimensions |
| Safe zone | The area where important content should remain | Keep text and logos inside this area |
What Is Bleed in Booklet Printing?
Bleed is extra artwork that extends beyond the finished page dimensions.
For example, if a photograph should reach the edge of your booklet page, the image must extend into the bleed area.
Without bleed, small trimming variations may leave unwanted white borders.
A common print bleed is 0.125 inches, but you should always follow the specific requirements of your printing provider.
Keep Text Away From the Edges
Important information should remain inside the safe zone.
This includes:
- Headlines
- Body text
- Page numbers
- Logos
- QR codes
- Contact details
Avoid placing essential content too close to the outside edges or center fold.
For a more detailed explanation, read our How to Prepare Files for Printing guide.
Step 6: Export Your Booklet as a Print-Ready File
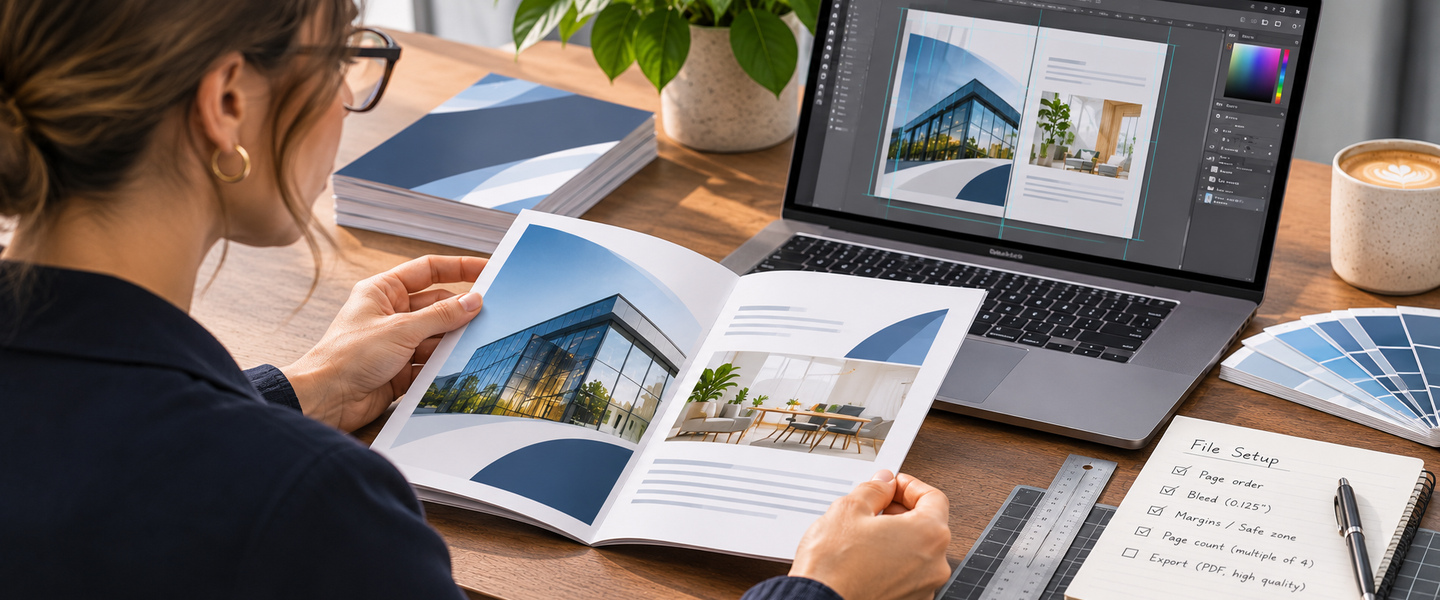
After finishing your layout, prepare the artwork for professional printing.
PDF is a common format for submitting booklet designs because it can preserve page dimensions, typography, and layout.
However, export settings matter.
Recommended Booklet File Settings
| Setting | Recommendation |
| Color mode | CMYK recommended |
| Image resolution | 300 dpi |
| Page layout | Individual pages, not imposed spreads |
| Dimensions | Match the selected booklet template |
| Bleed | Follow the product-specific specifications |
| Fonts | Embed or outline fonts |
| File format | PDF or another accepted format |
| Layers | Flatten as required by the printer |
Overnight Prints accepts several artwork formats, including PDF, TIF, PSD, PNG, JPG, EPS, and AI.
Its upload guidance recommends high-resolution artwork, correct full-bleed dimensions, and flattened files.
How to Export a Booklet PDF
The exact steps depend on your design software, but the general process is similar.
- Open your completed booklet design.
- Select the export or save-as option.
- Choose PDF as the output format.
- Export individual pages rather than facing-page spreads.
- Use high-quality print settings.
- Confirm that bleed and page dimensions match the printer’s specifications.
- Embed or outline fonts as appropriate.
- Save the file and review every page.
If your software offers a setting called “Print Booklet,” be careful: it may rearrange pages into printer spreads.
For professional booklet printing, a normal single-page export is usually the appropriate starting point.
Follow your printing provider’s upload instructions rather than assuming a home-printing workflow is suitable.
Step 7: Review Your Booklet Before Printing
Before uploading your artwork, review the entire booklet from beginning to end.
Don’t check only the cover and first few pages.
A small mistake in page order or layout can affect the finished piece.
Booklet Pre-Print Checklist
- The finished booklet size is correct.
- The total page count is a multiple of four.
- The cover pages are included in the page count.
- All pages are in the correct reading order.
- The document uses the required bleed dimensions.
- Important text remains inside the safe zone.
- Images are high resolution.
- Fonts display correctly.
- Page numbers are consistent.
- No important text is too close to the center fold.
- QR codes and website links have been tested.
- Spelling, prices, dates, and contact information are accurate.
- The exported files meet the printing provider’s requirements.
It’s also helpful to print a simple paper mockup.
Even a rough version can reveal problems with page order, text size, and content flow before you place your order.
Common Booklet Printing Mistakes to Avoid
Mistake 1: Designing the Wrong Number of Pages
A 14-page design won’t fit a standard saddle-stitched booklet format without adjustment.
Plan for page counts in multiples of four.
Mistake 2: Uploading Printer Spreads Instead of Single Pages
Some design programs offer booklet-printing settings that automatically rearrange pages.
Those settings are useful for certain home-printing workflows, but they may not match professional printing requirements.
For Overnight Prints, upload individual pages in reading order.
Mistake 3: Forgetting the Inside Covers
The inside front and inside back covers count as pages.
Remember to include them when planning your content.
Mistake 4: Placing Text Too Close to the Fold
Text near the binding can be difficult to read.
Allow enough space near the center fold, especially for long paragraphs and important details.
Mistake 5: Using Low-Resolution Images
Images that look acceptable on a screen may appear blurry when printed at a larger size.
Use high-resolution images and review them at their final print dimensions.
Mistake 6: Ignoring Bleed Requirements
Background colors and images should extend into the required bleed area.
Otherwise, trimming may leave white edges.
Mistake 7: Not Reviewing the Final Export
Your design file and exported PDF may not look identical if fonts, images, or settings change.
Always inspect the final version you intend to upload.
What Can You Create With a Printed Booklet?
Once you understand page order and file setup, you can use booklets for many business and personal projects.
Product Catalogs
Organize product photographs, descriptions, and important details across multiple pages.
For shorter product promotions, custom brochures can complement a larger catalog.
Event Programs
Create a booklet featuring event schedules, speaker information, sponsor details, and venue information.
You can also use custom invitations to promote the event before it takes place.
Training Manuals
Booklets can organize onboarding instructions, procedures, and educational materials into a format employees can reference.
Company Profiles
Introduce your business, explain your services, showcase projects, and provide contact information.
For meetings and presentations, pair company booklets with custom presentation folders to organize supporting documents.
Marketing and Sales Materials
A booklet can give potential customers a more detailed overview of your products or services.
You can support the campaign with custom flyers or postcards that direct readers to the full booklet or your website.
Frequently Asked Questions About Booklet Page Order and File Setup
How do you arrange pages for booklet printing?
For professional printing, arrange your pages in normal reading order unless your printer requests otherwise. Overnight Prints recommends uploading individual pages rather than two-page spreads.
Why do booklet pages need to be multiples of four?
Saddle-stitched booklets are made from folded sheets. Each sheet creates four printed pages, so the total page count must be divisible by four.
Does the booklet page count include the cover?
Yes. The front cover, inside front cover, inside back cover, and back cover are included in the total page count.
How many pages can an Overnight Prints booklet have?
Overnight Prints offers saddle-stitched booklets with 8 to 64 pages in increments of four.
Should I export my booklet as single pages or spreads?
For Overnight Prints, prepare individual pages. Do not manually rearrange the artwork into printer spreads.
What resolution should booklet images be?
Overnight Prints recommends 300 dpi artwork for printing. Use images with sufficient resolution at their final printed dimensions.
What is the best file format for booklet printing?
PDF is a common choice for booklet artwork, but other file types may also be accepted. Check your printer’s requirements before submitting.
Can I make a booklet in Canva?
Yes. Canva can be used to design a multi-page booklet. Choose the correct dimensions, account for bleed, and export individual pages using the appropriate print settings.
What’s the difference between a booklet and a brochure?
A booklet contains multiple bound pages, while a brochure typically uses a folded sheet or a smaller number of panels. For a more detailed comparison, read our Booklet vs. Brochure vs. Flyer guide.
Create a Print-Ready Booklet With Confidence
Learning how to make a printed booklet starts with understanding the relationship between page count, reading order, and file preparation.
Choose the correct size, plan your content in multiples of four pages, and design each page in the order readers will see it.
Then prepare your artwork with the correct bleed, safe zones, image resolution, and export settings.
Taking time to review these details can help prevent common printing mistakes and produce a more professional finished booklet.
Ready to print your project? Explore custom booklet printing at Overnight Prints to choose your size, page count, paper, and cover options.